
Last updated November 18, 2026








Free written scope consultation - allowances, timeline, and change-order rules on paper before a single trade is scheduled
Bathroom Remodeling Maintenance Schedule: What to Do and When
Here’s the thing most product guides get wrong for Las Vegas homeowners: they’re written for soft water. In a Summerlin bathroom, silicone caulk at a tub-to-tile joint needs inspection every six months, not the annual check most manufacturer care sheets suggest, because mineral deposits from hard water break down caulk faster and hide the hairline separations that let moisture reach the substrate. That’s the whole point of this guide. The materials in a finished remodel each have a maintenance interval, and under Las Vegas water conditions those intervals are shorter than the national averages. What follows is a twelve-month calendar calibrated for Summerlin: grout sealing, caulk inspection, exhaust fan cleaning, showerhead descaling, plus how to keep a log that protects your warranties and your resale documentation.
Quick Answer
In Summerlin’s hard water, most remodeled bathrooms need grout sealed once every 9 to 12 months (not the 12 to 24 months national guides suggest), caulk at wet joints inspected every 6 months, exhaust fan grates cleaned every 3 to 4 months, and showerheads and faucet aerators descaled every 4 to 6 weeks. Keep a simple dated maintenance log, because the log is what you’ll need if a warranty claim comes up under a 365-Day Done Right Promise or when a buyer’s inspector looks at the bathroom years from now. If you’re not sure what products went into your bathroom, we can help you pull together the product list before you start the schedule.
Styles & brands we work with
- Kitchen remodeling
- Bathroom remodeling
- Home additions & ADU
- Roofing
- Windows & doors
- Driveway & pavers
- Fence
Table of Contents
- Why Summerlin Water Changes Your Maintenance Calendar
- The Twelve-Month Bathroom Maintenance Calendar
- Grout Sealing: How Often in Summerlin
- Caulk Inspection: The Six-Month Rule
- Exhaust Fan Cleaning and Why It Affects Grout and Paint
- Descaling Showerheads and Faucet Aerators Without Voiding Finishes
- How Maintenance Protects Your Product Warranties
- When It Stops Being Maintenance and Becomes Repair
- Keeping a Maintenance Log That Works for You
Why Summerlin Water Changes Your Maintenance Calendar
Las Vegas municipal water is roughly twice as hard as the national average. If you want to look it up, the Southern Nevada Water Authority publishes the annual water quality report, and it shows calcium and magnesium levels that run considerably higher than most of the country. Inside a bathroom, that hardness does two specific things. It leaves mineral film behind that binds to silicone, tile sealers and metal finishes, and it accelerates the failure of soap, shampoo residue and sealer at grout lines because the minerals contribute their own film that conventional cleaners can’t fully lift. Both effects shorten maintenance intervals.
Summerlin has a second factor working against you. The dry climate (under 5 inches of rain most years) means interior humidity swings hard between winter and summer. In The Ridges and Red Rock Country Club, where bathrooms often face west or south exposure, sun-heated tile surfaces expand and contract more than they would in a coastal home, which stresses caulk joints. Combine heat cycling with hard-water film and you have the exact conditions our technicians see when they’re called in to inspect a bathroom remodeled three or four years ago: grout that looks intact but has lost its sealer, caulk that has started to pull at the corners, and a showerhead with enough scale that water pressure at the top of a shower rose has dropped noticeably.
None of this means Summerlin bathrooms are high-maintenance problems. It means the schedule has to be tighter than a national guide, and that keeping to a Japanese, a Redpoint, or a Summerlin West schedule is worth roughly the cost of one professional bathroom visit over a decade. If your bathroom was installed using tile, grout, and fixtures from Kohler, Moen or Delta, those brands publish care and maintenance requirements in their user manuals, and those requirements are how a warranty claim is evaluated. Every section below connects the maintenance action to the warranty protection it preserves.
The Twelve-Month Bathroom Maintenance Calendar
Here’s the calendar we suggest for a Summerlin bathroom. It’s organized so the tasks that matter most (caulk and grout) happen during the shoulder seasons when you can leave the bath out of service overnight without anyone noticing. If you’ve done a recent bathroom remodeling in Summerlin with us, we can produce your specific product list so you know which names to look up in the care manuals.
- Every month: Wipe shower walls and doors after the last shower of the day. This is where an exhaust fan running for 20 minutes after the shower matters, because the fan pulls the moisture that hard water wants to leave behind.
- Every 4 to 6 weeks: Descale the showerhead and faucet aerator. In Summerlin’s hardness, monthly is safer, and a monthly vinegar soak takes ten minutes.
- Every 3 months (March, June, September, December): Clean the exhaust fan grille and remove debris. Come spring (March), deep-clean the grout lines inside the shower, because that’s when the dry, dusty air leaves fine grit in the lowest joints.
- Every 6 months (April and October): Inspect caulk at the tub-to-tile joint, the shower pan-to-wall joint, and around the sink and backsplash. This is the six-month rule. Re-caulk anything that’s lifted, cracking, or holding discoloration.
- Every 9 months (if less shower use) to 12 months (if heavy use): Apply grout sealer to shower floor and shower wall grout lines.
- Once a year (January is easiest): Open the faucet aerator, check the cartridges behind the handles for drips, and take a dated photo of the inside of the cabinet under the sink so you can compare next year.
Write these dates on the inside of the vanity door and use a permanent marker to record when each task happens. The reason: manufacturer warranties on fixtures from Moen, Delta and Kohler can hinge on documented care, and a buyer who sees a dated log during a home inspection trusts the bathroom far more than one without documentation.
Grout Sealing: How Often in Summerlin
Seal the grout in a Summerlin bathroom once every 9 to 12 months, not the 12 to 24 months most product labels recommend. Hard water carries minerals that bind into a sealed surface and reduce the effective lifespan of the sealer, and tile manufacturers publish the care requirements their grout warranties depend on. If a grout joint tints darker than the surrounding tile when it gets wet, the sealer is already gone and needs reapplication. Test before you reapply.
Here is the test that works without a moisture meter: sprinkle a few drops of water into the shower’s grout line and wait 5 to 10 minutes. If the water beads up, the sealer is intact. If the water absorbs and the grout looks darker, the sealer is gone and it’s time to reapply. Do this in early spring. Spring is our busiest season for grout reapplication because the winter cold doesn’t do much to a bathroom, but the post-winter dust and the first warm week pull humidity out of the grout lines fast enough that any weakness shows up.
When you reapply, here’s what we suggest for a Summerlin home:
- Choose an impregnating sealer, not a topical coating. Impregnators penetrate the grout; topical coatings sit on top and peel as they wear, which turns a simple maintenance job into a grout replacement.
- Match the formula to the grout type. Cement-based grout (the standard) needs a water-based or solvent-based impregnator. Epoxy grout needs only a pH-neutral cleaner and should not be re-sealed, because the sealer itself is the barrier.
- Apply in a well-ventilated bathroom, on a dry grout surface, after deep-cleaning, with the exhaust fan running, and follow the manufacturer’s wait time before the shower is used (often 24 hours). If you have children in the house, schedule this on a day when a family member can stay out of the shower, or use the other bathroom for the day.
- Don’t seal grout in a brand-new bathroom before the grout has fully cured (allow a few days), because trapping residual moisture in the grout causes the sealer to fail and the grout to look patchy.
Grout maintenance is the single most cost-effective thing you can do to a remodeled bathroom. A re-sealed shower floor costs a fraction of what it costs to re-tile one. If your bathroom has been in service five years or more without a reapplication, we’re the ones to call: our general contractor in Summerlin team can tell you in one visit whether the grout still wants sealing or has moved into repair territory.
Caulk Inspection: The Six-Month Rule
Inspect silicone caulk at every wet joint every six months in a Summerlin home. The joints that matter most: where the bath or shower pan meets the tile, where the wall tile meets the tub, where the backsplash meets the counter, and around the toilet base if the manufacturer calls for it. Hard water accelerates caulk failure from both sides; the minerals abrade the surface, and the hairline separations that hard water contributes are hard to see until you deliberately look for them.
What to look for on your six-month walk through:
- Lifting at the corner or edge. A caulk line that pulls away with a fingernail is failing, even if it still looks attached.
- Discoloration through the thickness. If the caulk has gone from white to gray-brown in the middle, it’s holding moisture underneath and probably needs removal and re-caulk.
- Hairline crazing. Anywhere the caulk surface is breaking into fine cracks is exposed, no matter how small.
- Softness or tackiness. Silicone that has gone tacky has lost adhesion, typically from cleaners that were too harsh. This is common near a shower where the family uses a strong acidic cleaner.
- A gap between the caulk and the substrate. That’s where water reaches behind the tile. This is the big one.
Re-caulking is a task you can do yourself, but it’s also one of the most common failure points we’re called in to fix. The most common mistake is applying a fresh bead over old caulk: it looks fine for a year, then the new caulk telegraphs the old line and fails at the same joint. The correct method is to remove the old silicone completely with a plastic scraper, clean the joint with a pH-neutral cleaner and allow it to dry fully, apply a thin masking tape line, and lay a fresh 100% silicone bead designed for wet areas. If water has reached the substrate, re-caulking won’t fix it; that’s a repair, and the next section tells you how to know.
Exhaust Fan Cleaning and Why It Affects Grout and Paint
Clean the exhaust fan grille every 3 to 4 months in a Summerlin bathroom. A clogged grille is the number one reason a bathroom stays damp, which shortens grout life, stresses paint on the ceiling, and accelerates caulk failure. Dust is the airborne load in Las Vegas, and it collects on the grille and the fan blades faster than it would in a greener climate because there’s no rain to scrub the air. When the grille is partially blocked, the fan runs but moves far less air. The bathroom stays humid, and every joint fails faster.
The cleaning itself is simple. Turn off the switch at the breaker, remove the grille (usually a friction fit or two screws), wash it with dish soap and warm water in the sink, let it dry, and vacuum the fan blades from below. Don’t try to disassemble the motor housing; that’s an electrician’s job on most models and it can void the fan’s warranty. Put the grille back and check that the fan still pulls air strongly. If it doesn’t, the problem is inside the housing and it’s time to call someone.
One Summerlin-specific detail. In winter, when the outside air is dry and cool and the interior is warm, ceiling paint and grout can crack from thermal movement more than from moisture, and a working fan doesn’t prevent that. So don’t assume a ceiling crack in winter means your fan is failing. Look at the fan’s grille and feel the airflow; if both are fine, the crack is cosmetic. If the fan can’t move a tissue held against the grille, it needs service. Our team can inspect the fan and the ducting in a single visit and, if a replacement is needed, we install a name-brand unit with a manufacturer warranty that you can register.
Descaling Showerheads and Faucet Aerators Without Voiding Finishes
Descale showerheads and faucet aerators every 4 to 6 weeks in Summerlin. Descaling can be done without removing the showerhead, and that’s the safer method with any PVD (physical vapor deposition) finish, which is what most modern brushed-nickel and champagne-bronze finishes are. The two cleaning agents that are safe on a PVD finish are white vinegar (diluted 1 part vinegar to 3 parts water) and a pH-neutral, non-abrasive solution. The two that void finishes are any acidic cleaner stronger than household vinegar and any abrasive pad, including the standard “scrubbing” side of a kitchen sponge.
Here’s how to do it carefully:
- Fill a plastic bag or a small basin with the diluted white vinegar. Keep it at room temperature; warm vinegar attacks the finish faster than cool vinegar.
- Submerge just the head and the faceplate. Don’t submerge the joint where the shower arm meets the head; that’s where the finish is thinnest. A zip tie around the shower arm to hold the bag in place works well.
- Let it soak 20 to 30 minutes. That’s enough to break up Summerlin’s typical calcium film. A longer soak can etch the finish, which is where the warranty claim dies.
- Rinse with clear water and run the shower 15 seconds to flush the scale out of the faceplate holes. Reassemble and test for pressure.
- For the faucet aerator, wrap the aerator in a thin cloth to protect the finish, unscrew it, soak it in the same vinegar solution, rinse, and screw it back on. If the aerator is stuck, don’t force it with a wrench; call us. Stripping the faucet threads is a repair, not a maintenance task.
On a Moen or Delta faucet, the manufacturer’s care instructions in the box are what a warranty claim rests on, and they list the safe cleaners. Follow those, not the hardware store’s recommendation. Kohler publishes a similar list for its faucet finishes. When in doubt, use a pH-neutral cleaner designed for plumbing fixtures and skip the vinegar on anything metallic. If the showerhead is a handheld with a slide bar, the soap residue in the slide will build up faster than the showerhead will scale, so a monthly wipe is worth the two minutes.
How Maintenance Protects Your Product Warranties
Most bathroom product warranties do not cover neglect and abusive cleaners. Moen, Delta, Kohler and the tile manufacturers all publish written care requirements in their user manuals, and those requirements are how a warranty adjuster evaluates a claim. In practical terms, here are the care requirements that show up most often, and the ones the homeowner is most likely to trip over:
- Faucets: Clean only with a soft, damp cloth and a pH-neutral cleaner. Abrasive cleaners, ammonia, and bleach are specifically excluded. The cartridge warranty usually runs a limited-life guarantee and excludes damage from improper cleaning.
- Tile: Keep grout sealed per the manufacturer’s grout sealer requirement, clean with pH-neutral products, and don’t use acidic cleaners (including vinegar) on stone tile such as marble, travertine or limestone; those etch the surface and stone-produce etch damage isn’t covered.
- Countertops: Quartz and natural stone surfaces need the cleaner the manufacturer lists, and re-sealing on natural stone if the manufacturer calls for it. Cambria and Silestone quartz don’t need sealing, which is one of the reasons families with young children often choose quartz.
- Fixtures and finish: Avoid bleaches and abrasive powders on any brushed or PVD finish; both are excluded in most finish warranties.
The maintenance log you keep is what turns a warranty claim from a debate into a formality. When we complete a bathroom remodel in Summerlin, the final walkthrough produces a product list with model numbers so the homeowner knows which care manuals to file. We also stamp the project’s Elmstead Remodeling Summerlin home promise on every job: the 365-Day Done Right Promise, which means if it’s not done right after the job is complete, we make it right. A dated maintenance log under that promise is also the difference between a claim being straightforward and a claim getting contested.
When It Stops Being Maintenance and Becomes Repair
Here’s the line. Grout or caulk has moved from maintenance to repair when the damage is structural, not cosmetic: when the tile itself is loose, when a grout joint has widened or cracked across the tile face, when the substrate under the tile has softened, or when water has reached the shower pan or the wall behind it. In those cases, sealant and caulk won’t stop the water. You need a repair.
Here’s how to know which case you’re in:
- Soft spot at the caulk joint or around the toilet: press a screwdriver handle into the joint and the trim near the floor. Firm and dry is maintenance territory. Soft or damp is repair.
- Grout that has separated from the tile edges in one localized patch after moving about is a small re-grout; a whole shower has lost the bond between tile and substrate. Small re-grout is a couple hundred dollars; substrate repair is a different job.
- Any persistent smell, or a sponge surface that stays damp more than a day after use, means water is trapped behind. Usually the shower pan or the wall behind the tile, and that’s a repair, not a maintenance task.
- Tiles that sound hollow when tapped have lost their bond to the substrate. The fix is to remove and reinstall them, often with new substrate behind.
We’ve seen Summerlin bathrooms where two years of ignoring a failing tub-to-tile caulk joint turned a re-caulk job (a few hundred dollars) into a pan-and-substrate repair (several thousand dollars). The six-month inspection is what prevents that. If a repair is needed, it can usually be done without re-tiling the whole bathroom; our bathroom remodeling in Summerlin team handles spot repairs, and we’ll always tell you the cost difference between repair and replacing the whole surround.
Keeping a Maintenance Log That Works for You
A maintenance log is worth the ten minutes it takes if it does three things: dates the work, records the products used, and gets attached to the bathroom so it can’t be lost. It works for two audiences: a 365-Day Done Right Promise claim, where we need the service history to make a determination, and a future buyer or inspector, who reads the log as evidence the bathroom was cared for.
The simplest version that works: write the dates on a small card and tape it inside the vanity door. The more useful version is a single sheet with these six columns:
- Date of task
- Task performed (grout seal, caulk inspection, exhaust fan clean, showerhead descale, faucet aerator clean, fixture check)
- Product used (brand and finish, so you know which cleaner is safe next time)
- Cleaner used (this is the one that matters most for warranty evaluation)
- Condition observed (e.g., “caulk starting to lift at tub corner, re-sealed”)
- Photo reference (one photo per task)
Keep the sheet in a plastic sleeve taped inside the vanity door or in the folder with the bathroom’s own manual. When we finish a bathroom in Summerlin, we hand over the product list, so this log becomes the owner’s inspection trail. And when the family eventually sells, the log is what gives a buyer confidence the bathroom is being maintained, not just that it’s new. If you want a copy of the product list we use, or you’re not sure what’s in a bathroom that was remodeled before you bought the house, our team will look it up for you. If you’re planning a full kitchen remodeling in Summerlin alongside the bathroom, the same log discipline applies there too, and we’ll supply the schedule at the final walkthrough.
Common Mistakes to Avoid
- Applying fresh caulk directly over the old silicone. It fails within two years because the new bead telegraphs through to the old line. Remove the old silicone completely and allow the joint to dry before you re-caulk; a 20-minute job turns into a 90-minute job, and that’s the correct one.
- Using vinegar on stone tile or natural stone. Marble, travertine and limestone etch. Most people don’t realize the bathroom has stone tile until they see the etch mark. If you’re not sure what your tile is, call us and we’ll identify it.
- Skipping the exhaust fan because it’s “still running.” A fan that runs but doesn’t move air is the most common maintenance failure. Hold a tissue to the grille and watch how far the airflow moves it. If the tissue barely flutters, the fan needs service or replacement.
- Sealing new grout before it cures. Installing a bathroom in, say, March and immediately sealing in April traps residual moisture and causes the sealer to fail. Wait for cure time, usually a few days according to the grout manufacturer.
- Cleaning a brushed-nickel or PVD finish with a standard kitchen sponge’s scrubby side. It puts micro-scratches in the finish that inspectors and buyers see. Use a microfiber cloth or a soft nonabrasive pad.
- Assuming a quarterly maintenance visit from a plumber replaces a six-month inspection of the caulk and a 9-to-12-month re-seal. The plumber inspects plumbing, not sealants, and the two tasks keep different warranties intact.
- Never writing anything down. When a warranty claim comes up two years later, a written log dated in the homeowner’s handwriting settles the question. Without it, we can only work with what we can inspect at the visit.
See the difference
 Before
 After
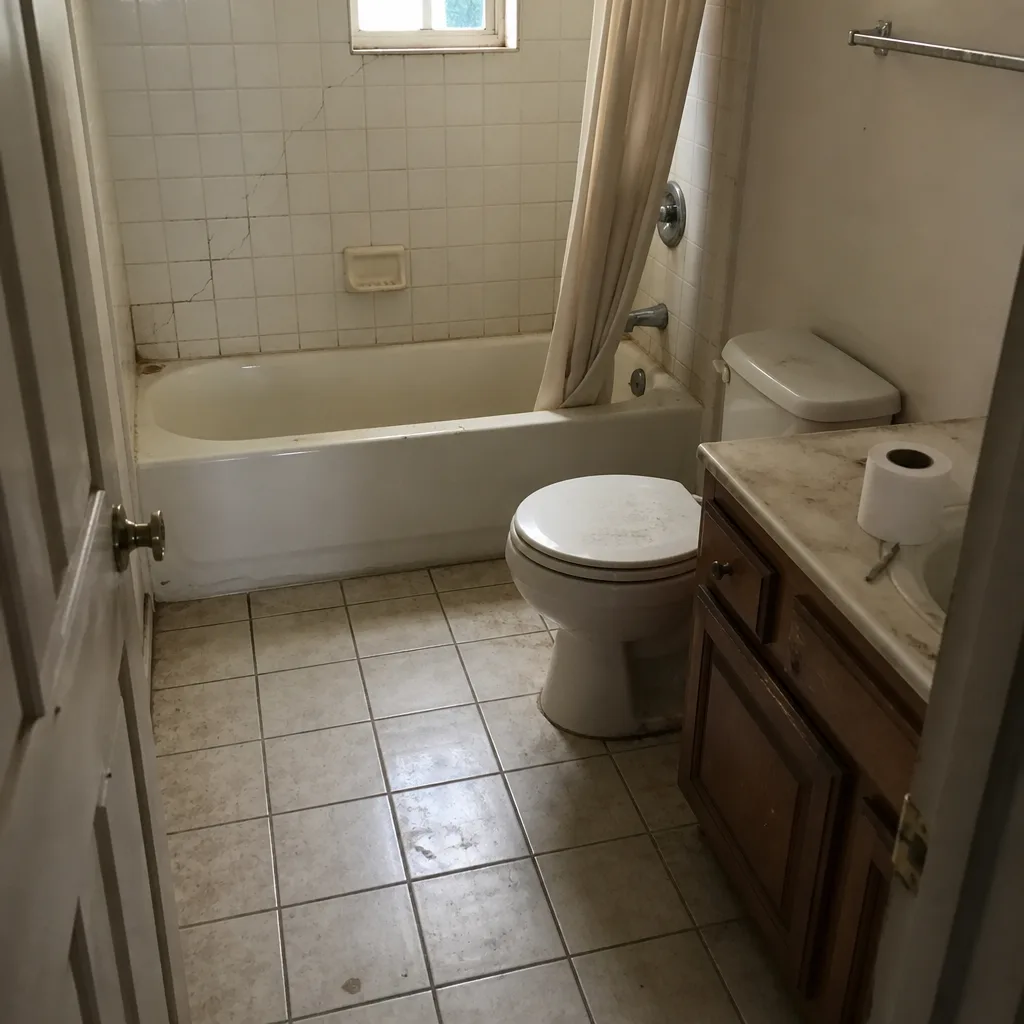 Before
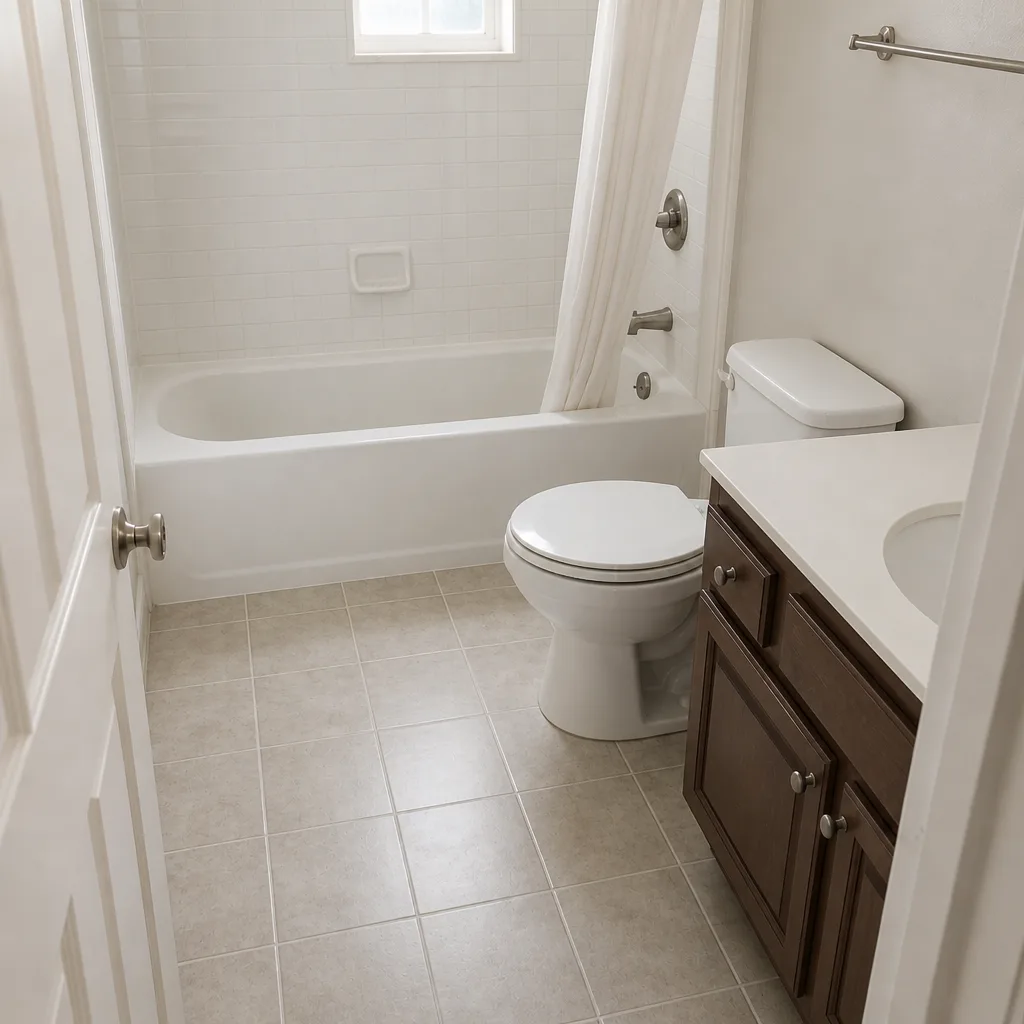 After
 Before
 After
When to Call a Professional
Call us when you see a loose tile, a widened or cracked grout joint across the face of the tile, a soft spot near the tub, a persistent damp smell, or a shower pan that stays wet more than a day after use. Those are the cases where the joint has failed below the surface and sealant won’t stop the water. Also call when you can’t identify the tile type or the faucet finish, because that determines what cleaner is safe. And call if your bathroom has been in service five years or more without resealing: a single visit can tell you whether the grout still wants sealing or the substrate has already begun to fail quietly.
Elmstead Remodeling Summerlin offers free estimates in Summerlin. Call (844) 797-4877 to schedule an inspection. Every visit is governed by the Cedarwell Care Promise: shoe covers and drop cloths inside the house, a written price before any work starts, a photo of the clean-up before the crew leaves, and quiet tools during family rest hours where possible. Our technicians are background-checked and uniformed on every job.
Frequently Asked Questions

Reseal once every 9 to 12 months in Summerlin, versus the 12 to 24 months national product guides suggest, because the hard-water film here wears down sealer faster. Test with a few drops of water on the shower floor before you reapply: if it beads, the sealer is intact; if it absorbs and darkens the grout, reseal. Call (844) 797-4877 for a free estimate and we’ll test it for you.
Yes. Six months is the right interval in Las Vegas and the six-month inspection is what most people miss. Hard water abrades caulk, and the minerals make hairline separations hard to see. A six-month check catches the failure lines before they become a water problem.
Use a soft cloth with a pH-neutral cleaner. Avoid ammonia, bleach, abrasive powders and any scrubbing pad, because most finishes on Moen, Delta and Kohler fixtures are acrylic and won’t survive them. Skip vinegar on any metal finish. Call us and we’ll tell you what your specific faucet model can take.
Not too soon: two years is exactly when we recommend the first inspection. A first-visit review checks grout sealer, caulk joints, the fan and the showerhead. We’ve found failures in Summerlin bathrooms at three years that weren’t visible from the shower floor.
Yes, if you keep records. Moen, Delta, Kohler and the tile manufacturers publish care requirements in their manuals, and most finish warranties exclude damage from abrasive or acidic cleaners. A dated log with the product and cleaner used at each service is what a warranty claim turns on.
Loose tiles, tile-face cracking at the grout line, a soft spot near the tub or floor, or a persistent damp smell all point to a repair below the surface. The tell: tap the tiles with a handle of a tool. A hollow sound means the tile has lost its bond. That’s repair territory, and it’s cheaper to fix early. Call (844) 797-4877 for a free look.
The Bottom Line
A Summerlin bathroom remodel is only as durable as the maintenance around it, and the maintenance schedule in this city runs a little tighter than the national guides. Caulk every six months, grout sealer every 9 to 12 months, exhaust fan every 3 to 4 months, descale every 4 to 6 weeks. Those intervals are what keep the manufacturer warranties on Moen, Delta, Kohler and other finishes intact, and what keep you in maintenance territory rather than rebuilding a shower floor. Write each task in the log as you do it. It’s the single record that carries your 365-Day Done Right Promise claim, or a future buyer’s inspection.
Call (844) 797-4877 for a free estimate or an inspection visit. Every visit is governed by the Cedarwell Care Promise: drop cloths on the floors, shoe covers at the door, a written price before any work starts, and a photo of the clean-up before the crew leaves. Our technicians have up to 21 years of experience.
Written by the team at Elmstead Remodeling Summerlin.